
Creating Automated Workflow Definitions
In order for users to create user-initiated request workflows, Workflow Definitions (like templates) must be created.
These would usually be set up by the administrator/s ofEmployee Self-Service Kiosk.
For example, a number of Training courses may be required for employees, such as Internal training, Office Staff training, WHS training, Factory Staff training.
A Workflow Definition can be created using the Training Request (sample) template to facilitate this.
Multiple Training Workflow Definitions can be created for specific Groups only or could be named for different training courses.
Users can then select the relevant Workflow Definition as described in Creating Automated Workflows.
Creating a Workflow Definition
- In the Admin menu, select Workflow Definitions
The screen displayed will list any definitions that have already been created. - Click Add Workflow
- The screen will display a number of sections to be completed, which vary according to the Workflow Definition Type - Request, Task, DB Triggered.
See Templates and Associated Sections below for more details. - In Workflow Summary, click the drop-down arrow for Workflow Template.
This displays a list of pre-defined sample templates to use as a basis for the Workflow Definition being created. - In Workflow Summary, provide a Title and Description, then click Save at the bottom of the window.
Note that nothing else is active in this window until this new Workflow Definition is saved. - To make this Workflow Definition available for selection by users, check the Active check box next to Properties.
- Data cap (items)for Task type Workflow Definitions refers to the limit you may decide to place on the events/emails that can be triggered by this workflow.
For example an Action Items Reminder workflow may trigger multiple reminder emails to be sent to employees.
The number here must be in the range 0-1000, but note that in this instance 0 will initiate the default number of 100, as zero items are not allowed. - Each of the sections displayed (i.e. those which are associated with the selected template) will need to be completed - as follows.
- Click Save when finished configuring the Workflow Definition to complete the creation process.
The new Workflow Definition is displayed in the list of Workflows at the top of the window.
Templates and Associated Sections
The following templates are available for selection, along with the sections that will be displayed for the selected templates:
| Workflow Templates | Sections Available | |||||||
| Triggers | Details | Scheduler | Email templates | Workflow Actions | Approvers | Escalation | Security | |
| Employee New Starter | Y | Y | Y | |||||
| Employee Rate Change | Y | Y | Y | |||||
| Field Change Notification | Y | Y | Y | Y | ||||
| Employee Birthday Workflow (report) | Y | Y | Y | Y | ||||
| Employee Birthday Workflow | Y | Y | Y | |||||
| Employee YOS Workflow (report) | Y | Y | Y | Y | ||||
| Employee YOS Workflow | Y | Y | Y | |||||
| Date Reminder | Y | Y | Y | Y | ||||
| Leave Request Workflows | Y | Y | Y | Y | Y | |||
| Training Request | Y | Y | Y | Y | Y | |||
| Events Request | Y | Y | Y | Y | Y | |||
| Property Request | Y | Y | Y | Y | Y | |||
| Skills Request | Y | Y | Y | Y | Y | |||
| Performance Review Workflow | Y | Y | Y | Y | Y | |||
| Document Approval Workflow | Y | Y | Y | Y | Y | Y | ||
| Position Request | Y | Y | Y | Y | Y | |||
| Additional FTE Request | Y | Y | Y | Y | Y | |||
| Change of Superfund Request | Y | Y | Y | Y | Y | |||
| New Contribution Request | Y | Y | Y | Y | Y | |||
| Employee Termination Alert | Y | Y | Y | |||||
Triggers
Triggers are available for DB Triggered workflow types and essentially monitor the Ready Pay database for something to occur to trigger the workflow:
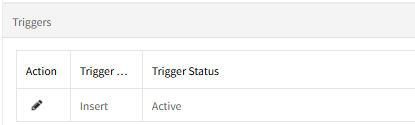
The Trigger/s defined by the template selected may need to be edited for the new workflow definition you are creating.
To do so, click the Edit  button in the Action column.
- The Trigger Condition Window displays the conditions (or rules) by which the trigger is activated.
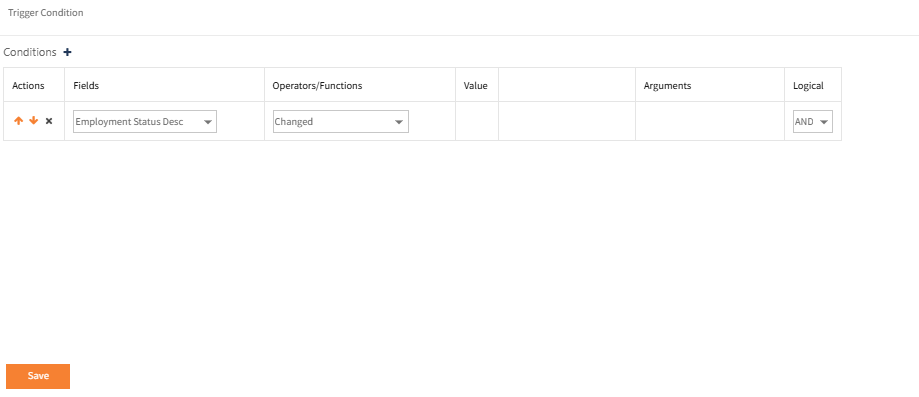
- The rule may need to be amended by changing the existing Conditionor by adding Conditions by clicking the + next to Conditions in the header, to create another Condition row.
-
Select the field to be monitored from the drop-down under Fields.
The fields available depends on the Table previously selected. - Select an appropriate Operators/Functions to apply to the Condition from the drop down.
The Operators/Functions available are those appropriate for the field selected. - If made available after selecting the appropriate Operators/Functions, select the Value.
This may be:
Constant - a specific value for that Field and Operator/Function.
Function - which activates some built-in functions.
Field - allows you to select another field in the database.
Once the Value is selected the next column unlocks where the Constant’s value can be entered or the Field can be selected.
For some Operators/Functions, only Constant is available. - Arguments will appear for certain Field and Value combinations.
For instance a Date Field set to the Value Function and a built-in function selected will unlock Arguments to select the number of days to apply to the selected Function:
- If there is only one Condition, the Logical value can be left set to AND.
If more than one Condition is to be added then select the appropriate value of AND/OR.
- When complete, click Save to save changes.
Note: some steps of a DB Trigger type workflow may not require a condition, in which case the Trigger Condition Window will be blank.
For example an Insert trigger may apply if anything is inserted on a specific table, and not just when a certain field is updated with a certain code.
Details
For DB Triggered workflow types this shows the table to which the trigger is attributed.
For example a workflow definition for Field Change Notification may be triggered by updates to the Company table .
Selecting the table determines what fields are available to be selected in the trigger.
For the Document Approval Workflow Template only the Employee table is available (and should be selected).
For the Employee Birthday Workflow or Years of Service report workflow definitions, Details contains the conditions and number of days to check options.
Scheduler
Specify the Active Period - i.e. the start date and, if applicable, the end date for the workflow definition.
Ensure that Use Default Scheduler is ticked.
This will apply the default workflow scheduler which must have been activated in Admin > System Options: the AW Options tab displays the default scheduled time; typically this is 00:00 (midnight).
Email Templates
All Workflow Templates enable the use of Email Templates.
The person creating the Automated Workflow selects the most appropriate Email Template and is able to edit it.
This email template is then used when the associated Automated Workflow is processed.
Actions
All Workflow Templates enable the use of Actions.
The Actions themselves are determined by the creator of the Automated Workflow.
They specify upon a particular Event occurring when an email should be sent and to whom
In the Workflow Actions page :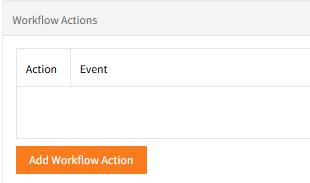
Click Add Workflow Action to display the Actions dialog box:
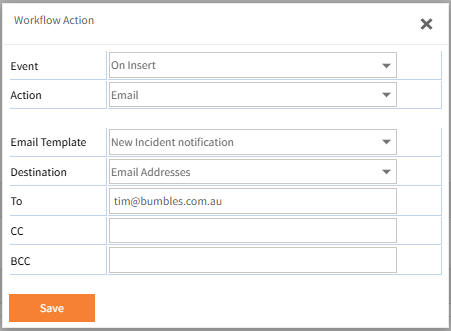
Select Save when you have finished editing the Action.
Note that currently Email is the only supported option.
Approvers
This lists any approvers defined for the selected workflow template, per Approval Stage. This may be appropriate for the definition you are creating, but you may also add further Approval Stages and approvers for each of those stages particularly if the Request requires multi-level or multi-stage approval.
Escalation
Escalations allow the automatic forwarding of the Workflow request to some other approver or position for approval after an elapsed number of hours.
Repeat escalation will continue to escalate up the Organisation Chart (HR pack only) if the request still remains unapproved after the hours elapse again.
Security
The Employee Self-Service Kiosk User Groups that the workflow is to be made available to should be selected.
Unless the Group security has been set-up correctly, the Automated Workflows may not be available for the appropriate Users or Groups.
See Employee Self-Service Kiosk Access and Security for more information on Security within Employee Self-Service Kiosk.
Return to Automated Workflows